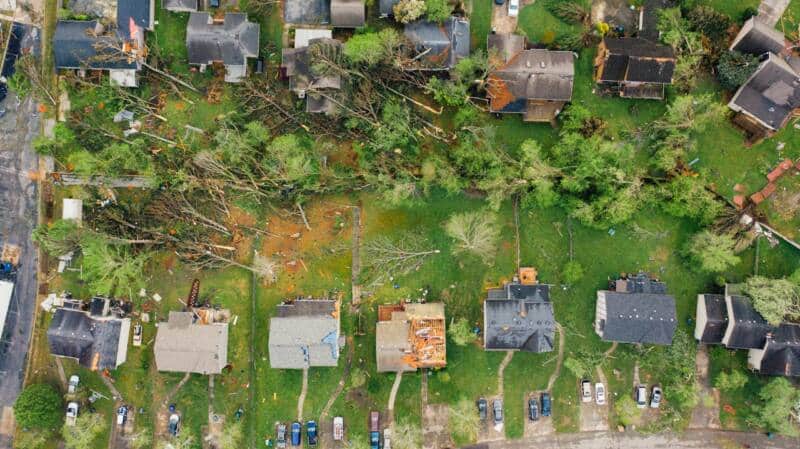
Severe weather conditions, such as storms, hurricanes, and hailstorms, have the potential to wreak havoc on rooftops. Your roof is the first line of defense against the elements, and when it becomes damaged, it puts your entire home at risk.
Understanding the necessary actions to take after a storm damages your roof is essential for protecting your home and avoiding further complications. While immediate repairs may be necessary, there are also steps you can take to document the damage and ensure a smooth insurance claim process. In this article, we will discuss the crucial steps to take after a storm damages your roof, providing you with guidance and peace of mind during this challenging time.
1. Assess the Damage
The first step after a storm damages your roof is to assess the extent of the damage. This should be done from a safe location, such as inside your home or using binoculars from the ground. Look for signs of missing or loose shingles, damaged flashing, and any visible holes or leaks in the roof. It’s important to take note of all the areas that are affected.
2. Check for Leaks
Inspect the interior of your home for any signs of water damage or leaks. Check ceilings, walls, and attic spaces for any discoloration, mold growth, or dampness. These are indications that your roof may have sustained significant damage.
3. Secure Your Property
If you notice any loose or hanging debris on your roof, such as branches or fallen tree limbs, it’s important to secure them immediately. This will help prevent further damage to your roof or surrounding property. If it is safe to do so, remove any debris that you can reach safely. For larger debris or branches that are difficult to remove, it’s best to call a professional roofing contractor for assistance.
4. Document the Damage
To ensure a smooth insurance claim process, it’s crucial to document the damage thoroughly. Take photos and videos of the damaged areas, both from a distance and up close. Make sure to capture clear images of any visible signs of damage, such as missing or damaged shingles, holes, or leaks. This documentation will serve as evidence for your insurance claim and help in estimating the cost of repairs.
5. Contact Your Insurance Company
After documenting the damage, contact your insurance company as soon as possible. Provide them with the necessary documentation, including photos and videos of the damage. They will guide you through the claims process and provide you with instructions on how to proceed.
6. Schedule Repairs
Once you’ve hired a professional roofing contractor, schedule the necessary repairs as soon as possible. Delaying repairs can lead to further damage and more expensive repairs down the line. Work with your contractor to develop a timeline for the repairs and ensure that they are completed promptly.
7. Follow Up with Your Insurance Company
After your repairs have been completed, follow up with your insurance company to provide them with any additional documentation or information they may need. This will help expedite the claims process and ensure that you receive appropriate compensation for the repairs.
8. Maintain Regular Roof Inspections
After your roof has been repaired, it’s important to schedule regular roof inspections to prevent future damage. Regular maintenance and inspections can help identify any potential issues before they become major problems. Consider scheduling inspections at least once a year or after severe weather events.
Need a Roof Inspection?
When you partner with Tristate Roofing & Remodeling, we will walk you through the process of keeping your roof in its best shape. Contact us today to get started!


